Monday, 27 August 2012
EXTEND A BIT ON GAMEPLAY
The movement is slightly different from some games. I would like to make a challenging game, so a polygon grid here is needed..
 The idea behind the grid is the trash from human dispose into the water moves in different types of movements. The harder the levels get, the crazier the trash block will move.

Tuesday, 21 August 2012
CHOSEN ONE
I finally chose the concept three - THE OCTOPUS. I think that concept is the most promising. To me, I think it is kind of hard to get all the animations and levels together by myself; but with a team, it doesn't matter anymore.


Thursday, 9 August 2012
ANIMATIONS - SCENE 2
 |
| Idle - Animation |
 |
| Walk - Animation |


FOREGROUND & BACKGROUND DESIGN - SCENE 2
Since I explained my problems through processing the scene 1, the scene 2 I just need some images to keep it much simpler
 |
| Background |
 | |
| Foreground |
 |
| Finished scene 2 - Factories |
CHANGES FOR SCENE 2
 |
| Color scheme changed |
 |
| The logo needed to be changed |
 |
| Taking out the old one then put a factory symbol in |
 |
| Put a "stop - no" sign on the logo to sending the message clearer |
 |
| Changes on the decorations as well. Spotted out the differences |
FOREGROUND & BACKGROUND DESIGN - SCENE 1
To create the foreground I need to put it into same size as background, and everything needed to be at right place because foreground couldn't move around. Luckily, I could take the whole scene pricesly (even the scene can't fit on the monitor screen) by stencyl (take screenshot feature). Putting into Photoshop, I could create the foreground now.

 The background is easier I didn't need the tileset set-up positions there, new blank canvas is ready for designing right away.
 Putting Background and Foreground in

Here is the finished scene 1 - Park


Here is the finished scene 1 - Park

MINOR IDEAS ON SCENE 1
I got some ideas popped up in my mind when I was trying to create the first scene properly (not trying anymore). I would like a some kinds of lake or river... So a bridge was needed. Here is the bridge building trial.

 So I couldn't use the same ground to build up a bridge, and even I needed a water tileset. Jumping into Photoshop, I created a water pattern and bridge for tilesets.

 Here what I put into the scene


I NEED FOREGROUNDS
Background is not enough for me, I thought of putting my model on a back ground with full of tree, but my model overlapped by fences (park)... Well, Stencyl does have a feature opposite of background called "foreground"... sweet!


THE TILESET
After taking the crash course 1 & 2 that we'd done 2 weeks ago, I know the tilesets are needed to create the ground for object to stand on. Taking inspiration from the template Jump and Run game's tilesets, I created one for my self for experiment.

 The rock pattern worked but didn't fit properly.


BACKGROUND RESEARCH
Since Stencyl is very new to me, so I need to learn everything bit by bit to get used to it. From the scene, I played with the background tab. Also I would like to create my environment by Adobe Photoshop, but how would those images fit on the scene. So I need to try it first, use the properties to get the scene size : width - 1600 height - 800. Then I create a new file in Photoshop with the same size in pixels. Interesting that it worked out and the resolution need to be : width - 1600 px height - 800 px with 72dpi.


2 SCENES ! NOT 1
So after the run & jump game template from stencyl, I couldn't find any ways to switch the scenes. Searching for codes but didn't work out, I started with other direction. I accessed to the scene 1, and went to "Behavior" tab to see what could I do with it.
 Oh wait there it is, the "Switch Scene on Enter Region", it seems I'm on the right track. But first of all, I need the scene in order to switch.
A very fast play around the stencyl, used the tileset it had there to create the scene 2.
 Tried to test the scene 2, but the problem was the model just floated above everything since I got my stair (in the image), so what was wrong with it? Then I found out the problem was in the physics tab...
 Well, the scene does need gravity to pull off the objects, great to know though. By the way, the behavior I mentioned above "Switch scene on Enter the Region" it needed a region for the object to enter. Look around the tools on the scene and found out to sketch a region...
 Well, tried it out and everything worked fine.. Yay!

A very fast play around the stencyl, used the tileset it had there to create the scene 2.


PUTTING ARTWORKS INTO STENCYL
So I got my final model and decided to put into the scene; tried to see what I could get from stencyl....
I used the template from Stencyl which creating whole bunch of codes for running and jumping (Jump and Run) game. I did save a lot work that not to work too much on the code.

Tried to put the artwork in...

 Get the model run and jump...

I used the template from Stencyl which creating whole bunch of codes for running and jumping (Jump and Run) game. I did save a lot work that not to work too much on the code.

Tried to put the artwork in...


THE SCENE WITH FACTORY
I didn't have much time left so I decided to create the scene with factories and smoke without looking for any precedents or trying to sketch... But I still got the experience hence creating the park scene.
IDEA ON ENVIRONMENT


Tuesday, 7 August 2012

SLIGHTLY FIXED MODEL
After colouring, I saw a little bit problematic with the "mom's" (temporarily identification) hair.So a fast fix occurs.


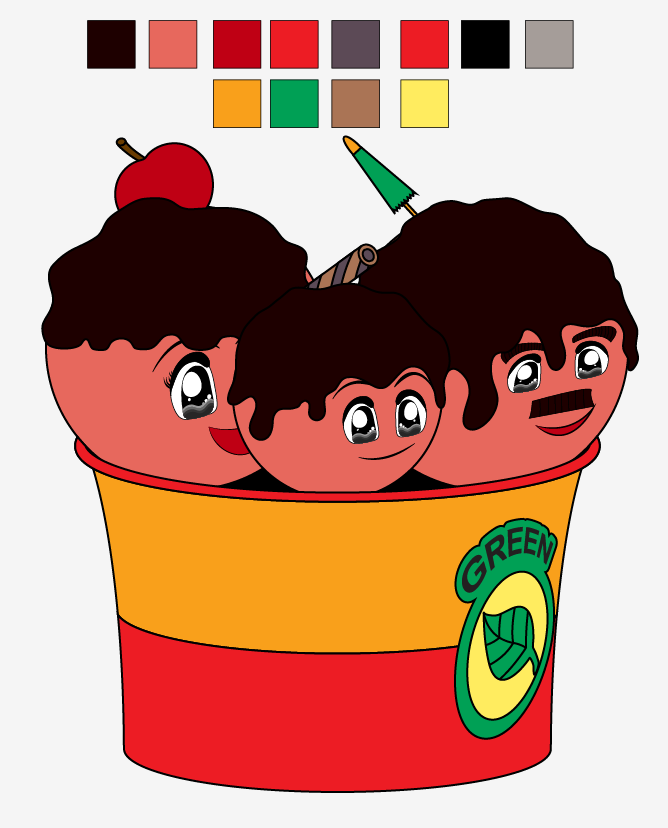
CHOSEN COLOUR CONCEPT

COLOUR DEVELOPMENT
Since I fixed the direction of the character, it seems to be done with the model. Therefore, I take to the next step : colouring. Firstly, I just take some colours samples and make mini swatches (a group of colours) and apply on the character. Here what I get.
 |
| Original model |
 |
| Colour Concept 1 - Strawberry flavour |
 |
| Colour Conept 2 - Orange flavour |
 |
| Colour Conept 3 |
 |
| Colour Conept 4 |
 |
| Colour Conept 5 |
 |
| Colour Conept 6 |
Subscribe to:
Comments (Atom)